I just got my new NodeMCU V3 board. I want to document this specific board I got from makerlab-electronics.com, so I wrote this article on How to Test a NodeMCU V3 Development Board.
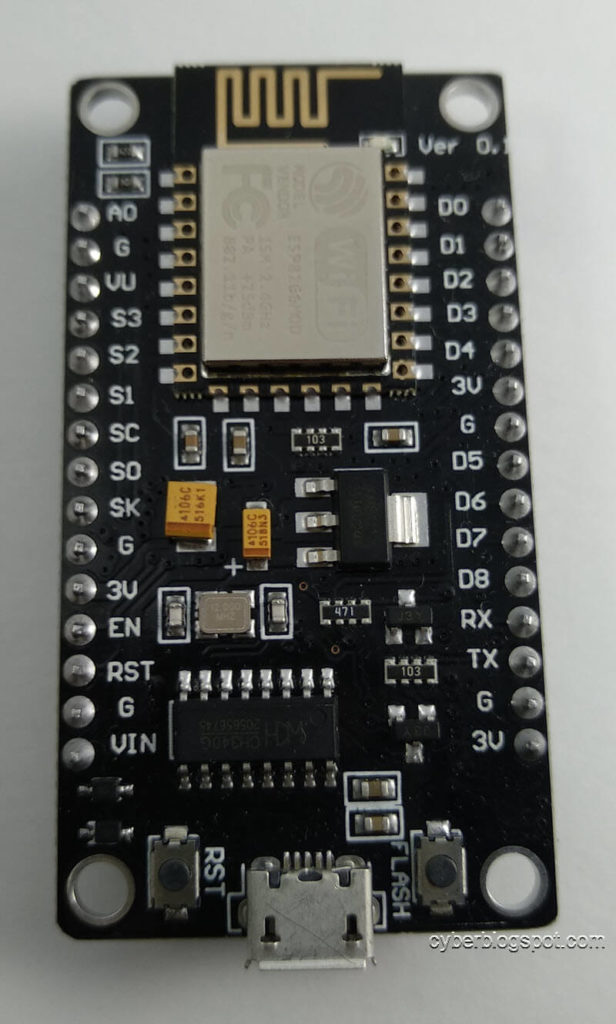
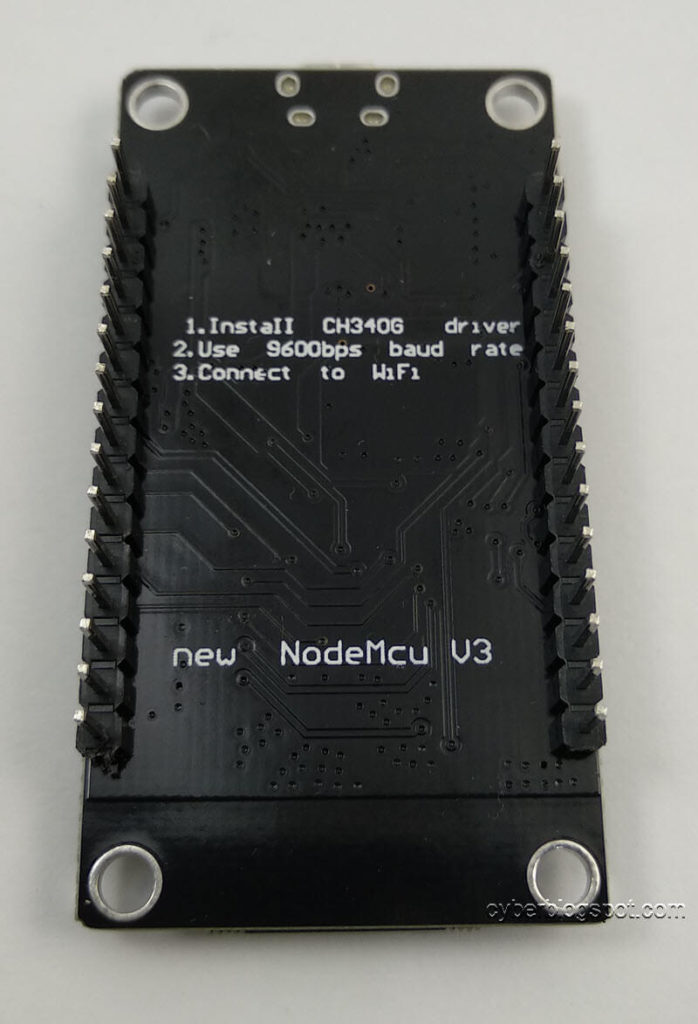
This is the NodeMCU V3 board that I am talking about:
I already have the Arduino IDE installed, so I just plugged the micro USB connector to the NodeMCU board and plugged the other end of the cable to my PC.
Opening Arduino IDE, I clicked on the Tools/Port item of the IDE’s menu. I found no additional port, meaning that the NodeMCU V3 board was not detected.
Installing the CH340 Device Driver
It turns out, we need to install the CH340 Device Driver because this board uses the CH340G UART chip. On other ESP8266 development board models, they use another chip called CP2102.
I found the device driver at Sparkfun : https://learn.sparkfun.com/tutorials/how-to-install-ch340-drivers/all#drivers-if-you-need-them
Testing with Arduino IDE
After installing the CH340G UART device driver, a new COM port was detected as COM8 in my PC.
Opening the Serial Monitor, I typed “AT” and press the return key. And then “AT+GMR” plus return key. This is my Serial Monitor output:
1 2 | AT AT+GMR |

The AT command “AT” tests if the NodeMCU V3 board is accepting AT commands.
The AT command “AT+GMR” is a request for version info.
Take note of the Serial Monitor’s status bar.
1. The line ending must be set to “Both NL & CR”
2. The baud rate must be set to 115200.
Otherwise, the AT commands will not work.
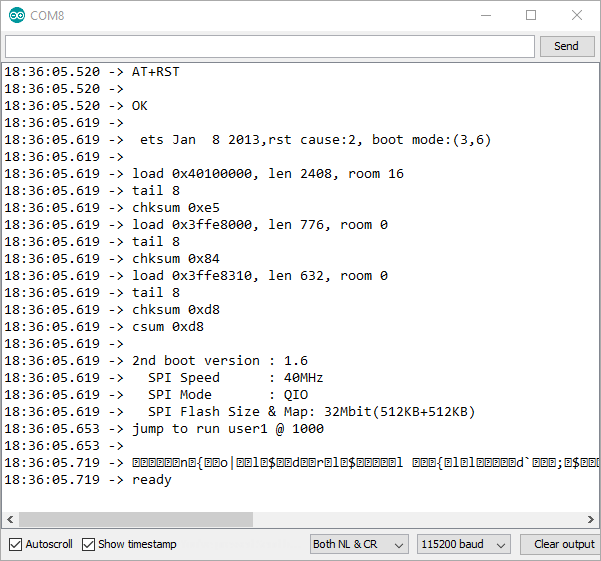
Let’s clear the monitor’s output by clicking on the “Clear output” on the status bar. Let’s try another AT command : AT+RST
1 | AT+RST |
Testing the Reset and Flash Button
Clear the serial monitor’s output and change the baud rate to 74880. Then, press the reset button on the Nodemcu V3 board.
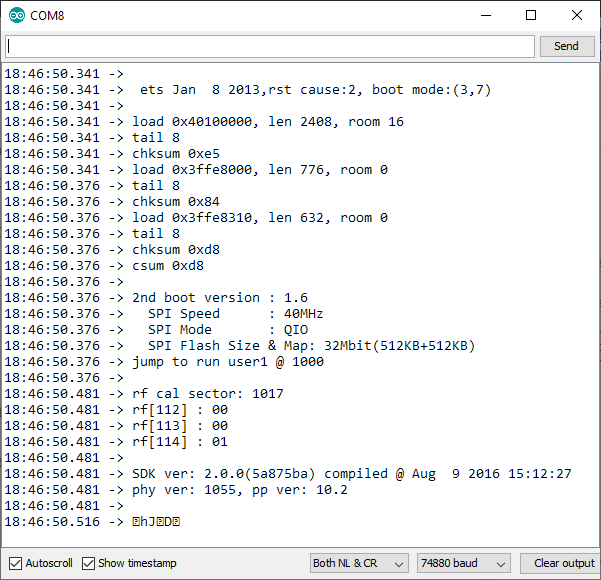
You should get a similar display output like the one generated by the AT command “AT+RST”, with additional info on the board’s rf settings. We changed the baud rate to 74880 because it is the default baud rate when the NodeMCU V3 board is booting up.
Again, clear the monitor’s output. Press and hold the “flash” button on the board. While still pressing on the “flash” button, press and release the “reset” button. Then release the “flash” button.
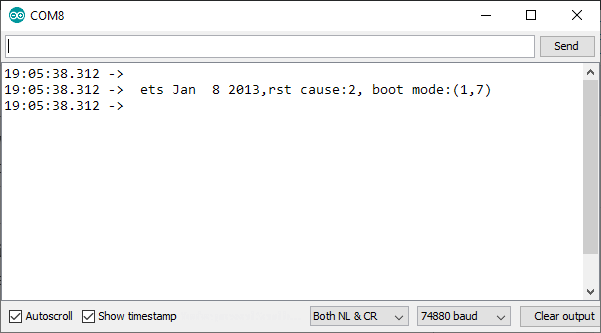
Everytime the “reset” button is pressed and released, the board will start its reset procedure. As part of the reset procedure, it checks the “flash” button if it is being held down or not. If it’s being held down, it will go into download mode and wait for commands from the serial port. Otherwise, it will boot normally, booting the program residing in the flash memory.
Take note of the boot message: boot mode (1,7). When the board is reset using the reset button, the boot mode is (3,7). When an AT+RST command is issued for reset, the boot mode is (3,6).
1 2 3 4 5 6 7 8 9 10 11 | reset causes: 0: 1: normal boot 2: reset pin 3: software reset 4: watchdog reset boot device: 0: 1: ram 3: flash |
Testing Internet Functions
Clear the monitor output and switch back the baud rate to 115200.
Let’s type “AT+CWLAP”. We should get a list of nearby AP stations.
1 | AT+CWLAP |

Type the following command, inserting your router’s SSID and password. Do not put any space before and after the equal sign (=) and before and after the comma (,) separating the SSID and the password.
1 | AT+CWJAP="ssid","password" |
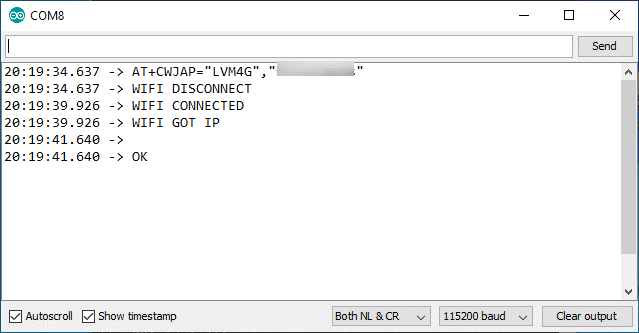
NodeMCU V3 should be able to connect to your router.
Related Articles How to Test a NodeMCU V3 ESP8266 Dev Board
NodeMCU ESP32-S Pin Configuration
Arduino Reference and Resources
While typing AT+CWLAP for testing internet function it is giving me ERROR and also for AT+CWJAP=”ssid”,”password”